Fixing multiple button presses being detected on IR remote on Linux when using evdev

Or: make your MCE remote work properly again on Kodi after upgrading to Ubuntu 18.04. No LIRC required.

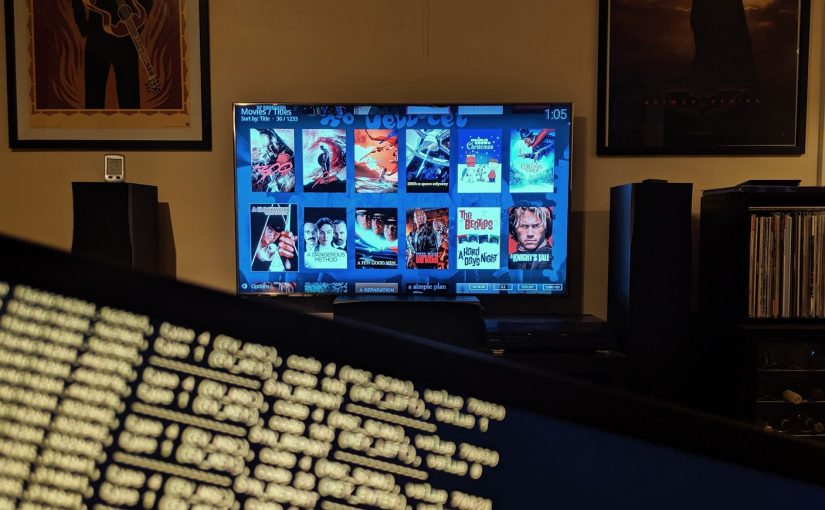
Ever since I upgraded my Kodi box to Ubuntu 18.04, I’ve been having issues with my beloved remote control, the MCE remote from Microsoft. (I’ve had it for years, I have perfect muscle memory for all the buttons. All the most important buttons are within thumb reach.)

My remote, an MCE type 2

First, it wouldn’t work at all, and after some frustrating hours of problem shooting I got it sort-of, kind-of working, but it started repeating button presses, ignoring some buttons and generally being pretty useless. I eventually gave up on using the original IR receiver, and found that if I used a third party IR receiver acting like a HID device, I could tweak the keyboard bindings in Kodi to make it more or less feature complete.

That only left me with one annoyance: some buttons would register double presses. Worse, the all important «OK» button was one of them. Whenever I was navigating through my media, the double click would randomly start a movie I didn’t mean to, go to a season I didn’t intend etc. Changing options was also a big hassle, whenever I tried to toggle subtitles, they would generally un-toggle immediately.

Fortsett å lese Fixing multiple button presses being detected on IR remote on Linux when using evdev

Using a Raspberry Pi as a surveillance camera in Home Assistant

Background

For the last few months I’ve been slowly building out my home automation system, based on Home Assistant. I have a couple of basic requirements for anything I add to it: It shouldn’t break the bank, and I don’t want any cloud features. For one thing, I don’t want my devices to suddenly stop working because of service disruptions, bankruptcy or outright planned obsolescence, but more importantly: I want to control my personal data.

I have a couple of other guiding principles as well: devices and systems based on open source is preferred, and whenever that is impractical, the stuff I buy should at least be based on industry standards. No walled gardens, please!

For instance I ended up with IKEA Trådfri for my lights, partly because of this short review by Matthew Garrett. I’ve successfully mixed and matched light bulbs from IKEA and Philips. I’ve also invested in a USB stick for Z-Wave integration.

So when I started looking for ways to add some cameras to the system, I quickly realized that «reasonably priced» and «no cloud» don’t mix. There are some awesome networked cameras out there, especially the Xiaomi Xiaofang/Wyzecam devices have impressive specs and are surprisingly affordable. Too bad that they also come with those pesky clouds (though there are ways to turn that stuff off). I could have gone with more traditional surveillance cameras from companies like Axis or Planet, but they are much pricier, and would generally require a wired connection. 

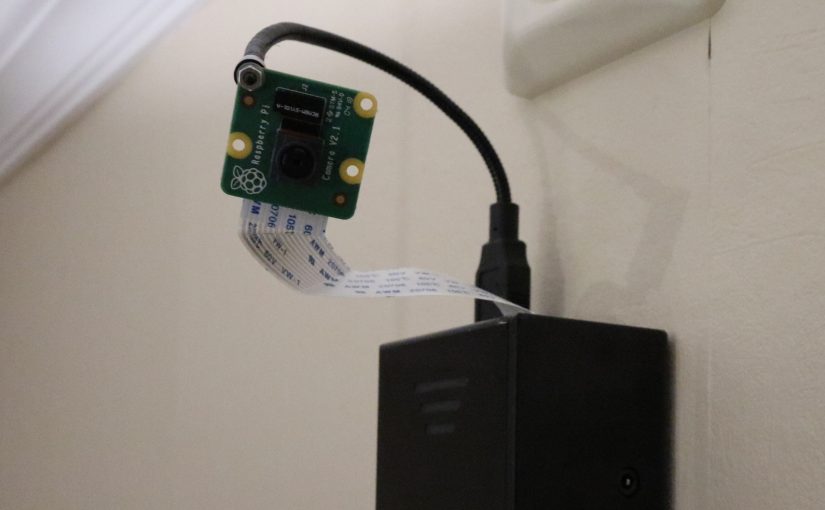
So I gave up looking for my dream camera, partly because I finally had an excuse to start messing around with Raspberry Pi and its Camera Module V2!

Fortsett å lese Using a Raspberry Pi as a surveillance camera in Home Assistant

Automatically tune PowerTop on bootup with SystemD

I use PowerTOP to get the most out of my battery on my laptop. Since PowerTOP doesn’t remember the settings from the previous bootup, I’ve made this quick and dirty SystemD unit file to fix my powertop settings on each boot:

[Unit]
Description=PowerTOP tunings

[Service]
Type=oneshot
ExecStart=/usr/sbin/powertop --auto-tune

[Install]
WantedBy=multi-user.target

Save it in /etc/systemd/system/powertop.service, run systemctl daemon-reload; systemctl enable powertop.service, and Bob’s your uncle.

Rate limit SSH connection attempts

I keep having to search for this little snippet, so here it is for my (and possibly your) convenience: how to rate limit SSH connection attempts with firewalld:

firewall-cmd --permanent --direct --add-rule ipv4 filter INPUT_direct 0 -p tcp --dport 22 -m state --state NEW -m recent --set
firewall-cmd --permanent --direct --add-rule ipv4 filter INPUT_direct 1 -p tcp --dport 22 -m state --state NEW -m recent --update --seconds 30 --hitcount 4 -j REJECT --reject-with tcp-reset
firewall-cmd --permanent --direct --add-rule ipv6 filter INPUT_direct 0 -p tcp --dport 22 -m state --state NEW -m recent --set
firewall-cmd --permanent --direct --add-rule ipv6 filter INPUT_direct 1 -p tcp --dport 22 -m state --state NEW -m recent --update --seconds 30 --hitcount 4 -j REJECT --reject-with tcp-reset
firewall-cmd --reload

If you want to review the rules you just added, you can list them with:

firewall-cmd --direct --list-all-rules

It’s way easier in ufw, though:

ufw limit ssh

How to disable EmulateWheel for TrackPoint

I upgraded to Fedora 22 on my ThinkPad X240 today, and immediately ran into a surprising and infuriating problem: My middle mouse button stopped working as a mouse button. Instead, it started behaving as a scroll button. I don’t need a scroll button, I need a middle mouse button.

The behaviour of the middle mouse button is traditionally governed by the option «EmulateWheel» in xorg.conf, and the Internet is full to the brim of examples for how to *enable* this behaviour. Thus if you do a Google search on how to *disable* it, you end up finding instructions for disabling it. But that’s irrelevant, Fedora 22 has stopped honouring this setting anyway.

The only way I found to get my middle mouse button back was this command:

xinput --set-prop "TPPS/2 IBM TrackPoint" "libinput Scroll Method Enabled" 0 0 0

Now I just need to stick that into a shell script and run it on logon. *barf*

Note to self: SSL/TLS debug tool

I’m typing this up in English in case it turns up in someone’s Google search results. 

I wanted to check up on my TLS certificate on one of my Apache vhosts today, using the good old command:

openssl s_client -showcerts -connect your.domain.tld:port

but ended up receiving the self signed certificate that ran on the server’s default domain. That wasn’t very useful, but I was reminded that I had seen someone mention a different tool in a blog post ranting about certificate caching lately. In an effort to avoid having to go through all the convoluted brain racking and Google searching the next time I want to find said tool, I’m leaving this note for myself here.

The tool in question is called gnutls-cli, and is part of the gnutls-utils package on Fedora or in gnutls-bin on Debian/Ubuntu. The syntax is very nice:

gnutls-cli your.domain.tld -p port

and it handles vhosts and stuff like that. It connects to port 443 by default, so the port part can usually be omitted.

How to tweak Google Chrome under Linux to manage Exchange Server 2013

Most, if not all, day to day management tasks for Microsoft Exchange Server 2013 can be achieved via your web browser by accessing the so called «Exchange Administration Center» with your browser. This is very nice for those of us who don’t run Windows on their desktop, and should allow for a little less RDP in our lives. However, some of the modal dialogues (as in «Edit» or «New» dialogues for e-mail addresses, certificates, server aliases etc.) refuse to pop up in Google Chrome (as of Chrome 37).

I could of course have started to use Firefox to manage Exchange, but that would only be a small step away from running RDP anyway, so here’s how you can (TEMPORARILY) re-enable the showModalDialog API in Google Chrome under Linux:

If you’re reading this after May 1st 2015, then I’m sorry, you’ll have to use something else to manage Exchange.

First, create the directories needed to hold Chrome Policies:

sudo mkdir -p /etc/opt/chrome/policies/managed

Next, create a policy file to hold our new policy setting:

sudo nano /etc/opt/chrome/policies/managed/showmodal.json

And add this as its content:

{
 "EnableDeprecatedWebPlatformFeatures": ["ShowModalDialog_EffectiveUntil20150430"]
}

Then completely restart Chrome (confirm that no chrome process is running before starting it again, Chrome likes to leave a systray running etc.).

Once Chrome has been restarted, you can check if your new policy has been picked up by checking chrome://policy, something like this should be showing up:

chrome-policy

Allow multicast and IGMP with UFW for IPTV to work

If you have access to multicast television in your network (such as UNINETT’s IPTV offer), and you’re running Ubuntu’s «Uncomplicated Firewall» aka. ufw, you’ll find that you’re unable to actually watch any of the channels. Here’s how you can adjust your firewall to receive the UDP multicast traffic:

sudo ufw allow in proto udp to 224.0.0.0/4
sudo ufw allow in proto udp from 224.0.0.0/4

This will take care of the coming and going UDP packets, but you also need to allow IGMP packets through. I haven’t found any command to make this change, so instead, you need to open up the file
/etc/ufw/before.rules
and add the following lines somewhere before the COMMIT line:

# allow IGMP
-A ufw-before-input -p igmp -d 224.0.0.0/4 -j ACCEPT
-A ufw-before-output -p igmp -d 224.0.0.0/4 -j ACCEPT

Now you can reload the firewall and you should be able to watch that glorious multicast IPTV.

HTPC del 2

Jeg skrev her om dagen at jeg tenkte å vente med bestilling av resten av HTPC-en til etter at jeg hadde mottatt mitt utkårede TV-kort, men den planen måtte i dag forkastes. Min tankegang er at jeg uansett snart blir nødt til å bytte ut Asrocken, og at et helt vifteløst system uansett ikke er å forakte. Dessuten, når jeg mottar TV-kortet må jeg jo ha en egnet maskin å teste det i …

Så da ble følgende deler i dag bestilt:

Kabinettet er sånn ca. i 1U-størrelse, med étt utvidelsesspor for PCIe/PCI-kort i full høyde. Dette er tildels viktig, da det er der jeg skal stappe TV-kortet jeg har bestilt fra før. Siden PCIe-kortet blir liggende i 180° vinkel mot hovedkortet mot normalt 90° må man ha et fleksibelt PCIe riser-card, og det bestilte jeg fra eBay i helgen. Jeg fant et for PCIe 1x, som greier seg for mitt bruk, og det kostet bare $ 2.

Til kabinettet må man også ha strømforsyning, og der var det ikke akkurat noe utvalg, jeg måtte pent finne meg i å bruke 750,- på den tilhørende strømforsyningen. Spør ikke meg hvorfor de har valgt å selge dette separat, da det er eneste tilgjengelige alternativ. Samtidig tok jeg med IR-modulen som er spesiallaget til kabinettet, den har listet opp Linux som et støttet operativsystem, så der ble jeg positivt overrasket.

Så til hovedkortet. Der gikk jeg for et mATX-kort, da jeg vet av erfaring at Mini-ITX-hovedkortene har en kjøleribbe akkurat der hvor heatpipes-ene til kabinettet må gå fra CPU-en og bort til kabinettets yttervegg. Jeg har ikke lykkes i å finne et Mini-ITX-hovedkort uten denne lille skavanken. Men det spiller ingen rolle, det er god plass til et mATX-hovedkort. Kortet jeg valgte er rett og slett det billigste jeg fant på Komplett som oppfylte fire kriterier: Billig,på lager,  ingen kjøleribber eller andre elementer i veien for der heatpipes må gå, og det hadde TOS-link for optisk lyd. Jeg er enn så lenge avhengig av dette for å få digital lyd til receiveren min, som mangler HDMI.

Til hovedkortet valgte jeg bare ut litt RAM som lå linket opp som tilbehør for hovedkortet, mest fordi jeg er lat. RAM er billig, og ytelsen på RAM-en er ikke noe jeg trenger å bry meg om i dette prosjektet. Jeg ser imidlertid på bilder i etterkant at de er unormalt høye på grunn av noen rare kjøleribber, så det blir spennende å se om de passer.

Prosessoren er derimot et mer gjennomtenkt valg: Jeg vil ha nok kraft til å kunne kjøre de mer effektdrevne temaene til XBMC, samtidig som jeg vil ha lavt strømforbruk både for varmeutviklingens og strømregningens del. Core i3 finnes i 35W, 55W og 65W, jeg landet på 3225-varianten fordi den hadde den greie kombinasjonen av 55W og nyeste versjon av Intels on-chip GPU: HD4000. Dette burde gi meg mer enn nok kraft til å både dra grensesnittet og spille av filmer i full HD, kanskje til og med med litt etterprosessering. Det er også viktig å huske at jeg skal kjøre PVR på denne maskinen, så jeg trenger litt kraft til videohåndtering.

Til sist må man jo også ha en harddisk å kjøre det hele på. Her gikk jeg rett og slett for kriteriene: «billig» og «på lager». Ytelsen er igjen ikke noe stort problem, jeg går for SSD mest på grunn av at det er fullstendig støyløst.

Det hele kom på den nette sum av 5.851,00 med frakt. Det koster å være kar. Dessverre var ikke strømforsyningen på lager, så jeg må smøre meg med tålmodighet til de får den inn, «ubekreftet dato» lover aldri godt.