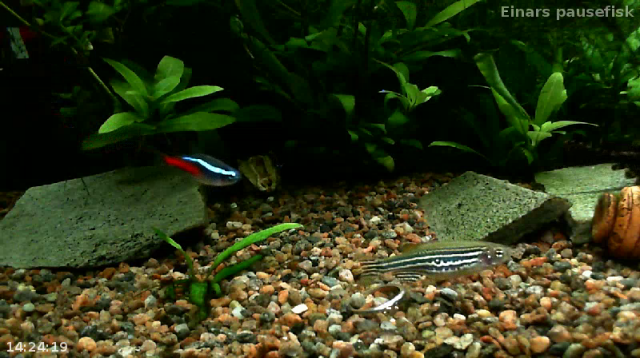
I’ve been playing around with live streaming from ffmpeg recently, and my latest adventure was to try adding a time stamp to the feed. I searched Google for a solution, but couldn’t find a complete howto, so this is pieced together from information I found found all over the net.
Turns out, all the information you really need to get this working is already in the libavfilter documentation, I just didn’t read it carefully enough.
First of all you need to have a recent build of ffmpeg, with the --enable-libfreetype flag enabled. Just use this excellent howto, and add the flag yourself in the configure-step. You must also make sure to have the libfreetype-dev package installed. This is all provided you use a Debian or Ubuntu based distro, of course.
Once you have built ffmpeg you can check if you have the necessary filter installed with this command:
ffmpeg -filters | grep drawtext
That should print out the following line:
drawtext Draw text on top of video frames using libfreetype library.
Now you should be able to do something like this:
ffmpeg -f video4linux2 -i /dev/video0 -s 640x480 -r 30 -vf \
"drawtext=fontfile=/usr/share/fonts/truetype/ttf-dejavu/DejaVuSans-Bold.ttf: \
text='\%T': fontcolor=white@0.8: x=7: y=460" -vcodec libx264 -vb 2000k \
-preset ultrafast -f mp4 output.mp4
In short, this sets up capture from v4l2-device /dev/video0 with a framesize of 640×480 in 30 fps (pretty common for older webcams). The -vf is where the filter gets applied. fontfile gives the path to a TTF font, text contains the text we want, in this case we want to expand a strftime() sequence (see man strftime for a full list of parameters). Note the escaping slash in front of the %. Then we set the font color to white, with a 80% opacity. There are many other options, such as fontsize, but I haven’t tried them.
Hope this is useful for someone out there.
Addendum, February 21, 2016
Turns out, this blog post has been dug up by people from time to time, judging from the number of pingbacks it has accumulated over the years. So in case you’re here now: ffmpeg made some changes to how they do text expansion (go figure), and the link to the documentation changed too. Here’s a revised example, using a more modern camera with mjpeg for good measure:
ffmpeg -f video4linux2 -input_format mjpeg -s 1280x720 -i /dev/video0 \
-vf "drawtext=fontfile=/usr/share/fonts/dejavu/DejaVuSans-Bold.ttf: \
text='%{localtime\:%T}': fontcolor=white@0.8: x=7: y=700" -vcodec libx264 \
-preset veryfast -f mp4 -pix_fmt yuv420p -y output.mp4
 Jeg må på et eller annet tidspunkt lære meg litt mer om red5, slik at jeg kan ditche kommersielle produkter fullstendig i produksjonskjeden, men Wowza er et fantastisk godt produkt som er vel verdt penga. For ordens skyld, jeg benytter meg av Høgskolen i Gjøviks streamingserver.